Pages

Saturday, December 3, 2011

Homemade French Roast Chicken

When I think of French cooking, I naturally think of lots of butter and juicy flavor. This recipe is no exception! I learned how to make this from Julia Child's cookbook ( I checked out Vol. 1 twice), and have since made it hundreds of times. It is one meal that my kids thoroughly enjoy and can be paired with anything from baked potatoes to cream cheese and spinach!


First, you will need a good quality chicken. I usually get mine from a local butcher, but you can also buy them direct from local farms.

In addition to a chicken, you will need:
1 large onion, roughly chopped
3 large carrot, roughly chopped
about 1/2 stick unsalted butter (1/4 cup)
sea salt

Pre-heat oven to 425 degrees.
Pat the chicken dry, then coat it generously with about half the butter. Salt the inside of the chicken with sea salt. Place the chicken in a heavy-duty pan (I used a large cast iron skillet) on its back. Lightly salt the outside with sea salt.

Brown the chicken on each side for 5-7 minutes each (on back, then on sides). Baste the chicken in-between with the remaining butter and a basting brush. I find that a large spoon, placed in the bottom side of the chicken is a good way to turn it without tearing the skin.


When the chicken has browned on all sides, keep it on its side. Add the chopped veggies and reduce the oven temp to 350 degrees. By this time, there should be enough butter and drippings in the pan to use for basting. Baste the chicken again before closing oven.

After adding the veggies, baste the chicken every 15 minutes for the remainder of the cooking time. Flip the chicken to its other side half-way through. Roll the bird onto its back about five minutes at the end.


One good way of checking to see if your chicken is fully cooked is to cut the skin between the breast and the leg. If the juices are golden, it is cooked. If the juices are pink, put your bird back into the oven for 10 minutes intervals until the pink is gone.

My bird was a little over 5 lbs, and I let it cook (total time) for 1hr 30minutes. You can adjust this according to the weight.

The veggies in the basting juices are delicious, and add flavor to the chicken, also! Use them as a garnish for the meat. You can also throw some baking potatoes into the oven when your bird has about an hour left to cook. I use a cast iron skillet with a lid to bake my potatoes, after having coated them with coconut oil and salt.

Another great side would be cream cheese and spinach! Just cook a bag of frozen spinach according to package directions, then drain most of water. Add 4-6 oz cream cheese (cubed) to spinach, then season with salt, pepper and nutmeg. This is my favorite way to eat spinach!

Make sure you save your chicken carcass for making stock! Here's a video to show you how :)
I don't usually brown the bones before throwing them in the stock pot, and I incorporate the drippings from the iron skillet in my stock- Yummy!

Wednesday, November 2, 2011

Homemade Artisan Sourdough Bread

I love sourdough bread. The slighly sour taste mixed with hot melted butter is heaven to my taste buds. Since starting a sourdough starter over a year ago, I have been trying to perfect this artisan loaf. I have to say, it has the best texture and crust of any I have tried! Real artisan sourdough is often cooked in a brick oven in a terracotta dish, but I believe this version is perfect for the everyday chef.


This is my sourdough starter. It is in its second year of living in my refrigerator, and it has worked hard for me. I have made sourdough bagels, sourdough pancakes, and sourdough bread, all from this one magical, bubbly mess! You will need at least 1/2 c of starter for this recipe.


These are the only two vessels needed for making this sourdough. The glass bowl is for mixing, and the round casserole dish (with a lid) is needed for baking.


The first mixture is the most important part of this recipe. If you don't get the texture right, your bread could fall flat! For this mixture, you will need:

1/2 c sourdough starter (I sometimes throw in a bit more)

3 c flour- this time, I used 1 1/2 c unbleached and 1 1/2 c spelt. The more whole grain flour, the denser your bread will be. I find that the 50-50 ratio makes a great loaf.

1 t sea salt

1 1/2 c water

Mix everything in a glass bowl. If the mixture is runny, add more flour. The dough should be firm but wet, as in the picture above.

Since the dough will need to sit out for a long period of time, start the dough with respect to the meal with which you will eat it. For a lunch loaf, start the dough around 5pm the night before. For a dinner loaf, start it around 10pm the night before.


Next comes the waiting... as with many traditionally-made foods, sourdough requires a long fermentation. I let it sit on my counter, covered with a wet towel, for 12 to 15 hours. The timing all depends on the temperature of your home. Since it's been fairly warm in my home lately, I let my dough ferment for 13 hours. The picture shows how much it has risen overnight.

When your dough is ready, you need to "flip" it. I call it this because it is kind of like flipping pancakes :) Get your hands really floury, and sprinkle the top with a few pinches of flour, then flip it from the side to the center of the bowl. I usually turn the bowl 2 or 3 times while I'm flipping to make sure I get it all unstuck from the bowl.


When you have flipped your dough, turn it out on a lightly floured surface while you clean and grease the bowl. This picture shows my dough after having been flipped and back in the glass bowl. I coated my bowl generously with virgin coconut oil.

Re-cover the dough with a wet cloth and let it sit for the second rise. This rise could range anywhere from 2 to 4 hours. Today, mine took 2.5 hrs.


Here's my dough, ready for baking! If you let the dough go too long, you might see large bubbles coming to the surface and popping. If this happens, don't fret- just get that loaf in the oven pronto!

To bake your sourdough, preheat the oven and the lidded baking dish to 450 degrees F. I have tried baking at a lower temp, but the crust just isn't the same! When oven and baking dish are heated, carefully remove the lid and pour in your dough. You may need to use your hands or a stiff spatula to help the dough along. Cut some 1" slits in the top of the dough with some kitchen scissors and replace the lid.

Bake 30 minutes with the lid ON.

After 30 minutes, remove the lid and bake for an additional 15 minutes with the lid OFF.


Here's what you will pull out of the oven! A crusty loaf fit for a French boulangerie. It is fantastic with a large dollop of butter or dipped in your favorite seasoned olive oil! Artisan quality, and oh so delicious!


Here's a cross section of the bread to show you the fluffy goodness you'll find under that crispy crust! My kids ate the other half... If you are not satisfied with the rise of this loaf, you can always use 100% unbleached flour for an amazingly fluffy bread.

This post was shared on Monday Mania at the Healthy Home Economist

Tuesday, October 11, 2011

Homemade Pumpkin Pie

What a wonderful time of year for pumpkin! Halloween is just around the corner, and pumpkins are on sale in every store... Our local Publix had their "pie pumpkins" on special last week, so we indulged :)


I made this pie last year, and it was so yummy it called for a repeat performance! Last year I used a regular pie crust, but this year I've paired it with a homemade graham cracker crust- 100% from scratch! Here's a wonderful desert for any holiday dinner:

Homemade Graham Crust:
7-9 Homemade grahams
1/4 c melted butter

Mix and press into an 8" x 11" glass pan

Bake at 350F for 15 minutes.

Pumpkin filling:
1 3/4 c roasted pumpkin (cut in half, discard seeds and bake at 325F for 1 hour on cookie sheet. Scoop out soft parts and discard the skin.)
3/4 c honey
3 eggs
1/2 t each: ginger, nutmeg, cinnamon
1/2 t salt
12 oz milk

Mix everything in a blender until smooth, then pour into prepared crust.

Bake at 325F for about an hour or until center is set.

Enjoy a piece of this pie with plenty of fresh whipped cream- trust me, they are meant for each other!

Sunday, September 11, 2011

"Homemade" Egg Comparison

I am so excited... last week, I posted a rant about store-bought eggs. I have been waiting very im-patiently for my RIR hens to lay their first eggs. Just a few days later, my daughter's hen, Panini, gave me what I was waiting for! And, was I impressed! Just look at how a free-range egg compares to one of those store-bought, organic, all-vegetarian-diet eggs!! :


Honestly, there is no comparison. The organic, store-bought egg had a pretty good shell, and the white was clear, but look at that yolk! As I stated in my rant, the yolk should be more on the orange side of yellow. This chicken was nutritionally deficient, and laid an inferior egg.


Drum roll, please!... And here is our Panini's free-range egg! Look at the quality yolk. The orange yolk tells us that Panini ate plenty of nice, juicy bugs and any other critters she found in the yard (including a snake!). Once again, chickens are NOT vegetarian. They need a quality, balanced diet to lay quality eggs like this one!


Wow, have you ever seen scrambled eggs this yellow from a batch of store-bought eggs?? They are also the most delicious eggs I have ever tasted :)

If you can't keep your own chickens, contact a local farmer to get free-range eggs. I found my ex-egg provider on Craig's List! Take a tour of their farm and make sure the chickens are getting access to open areas and not penned up in a dirty coop. If the farmer raises them the right way, he will be more than willing to open his farm for a private tour.

This post shared on Monday Mania

Saturday, September 10, 2011

Homemade, Non-Greasy, Bug Repellent

I have gotten so tired of mosquitoes this year! The rainy season has been upon us for months, and I see no end to it in the near future... although the constant buzz of sprayer airplanes is overhead, we are still plagued by mosquitoes every time we open the door! Unfortunately, their favorite place to hide is on our front porch :(

I have attempted to make homemade bug repellent a few times, but it never worked out. I used olive oil as my base every time, and it was messy and sticky! As with some commercial repellents, having sticky, greasy skin while outside is not the ideal situation. Every time I used my homemade olive oil blend, I came back inside with sand, dirt and various other organic material stuck to me in a slimy mess... not any more!


The solution to my dilemma was witch hazel! Witch hazel is a natural astringent, so it is soothing for the skin, non-greasy and quickly absorbed. It also has a very mild scent- kind of like graham crackers :)

For my homemade formula, for every 1/2 cup of witch hazel, I add:

25 drops cedar wood essential oil
15 drops citronella essential oil
10 drops eucalyptus essential oil
10 drops tea tree oil
a drizzle of neem oil (to your discretion, as this really alters the nice, herbal scent. Neem oil tends to smell like a fart.)

Mix everything in a mister bottle and spray liberally on exposed skin before going outside.

Be sure to shake before each use! You'll be amazed at the effectiveness of this homemade herbal bug repellent, and no grease :)

Sunday, September 4, 2011

Homemade Compost Tumbler


I wrestled with my five citrus trees last weekend. I have the scrapes to show for it, too! All together we have five citrus trees: a grapefruit, two tangerines and two oranges. I don't think they've been cared for in years, because I had a lot of trimming to do. It wasn't the right time to prune citrus- usually right after it fruits, in late winter is best- but when I get an idea to do something, I do it NOW.


You can see we have some fruit, but I am really uncertain of the quality. For quality citrus, you need quality fertilizer, and they are definitely not getting any of that! So, after picking the last thorn out of my skin I had an idea: why not make my own fertilizer?


We have lived on our 9 acres a very short while, so there is still a lot to clean up after the last owners abandoned it. In one of the out-buildings, I found a few 55 gallon drums that looked promising...


After finding a barrel that was empty and did not have any traces of anything potentially toxic, I got my husband's tools and went to work. First thing I did was to drill 1/2" holes all over it- the compost materials will need plenty of oxygen to decompose, so I put them everywhere and anywhere...


Then, I needed an axis for the barrel to spin on so I put a spare piece of galvanized conduit through the middle. I am going to mount the barrel to two posts in the ground later, so I left extra tubing extending from both ends.


I ended up putting two more conduit pieces through the barrel to help with flipping the compost material- otherwise, it would just slide around on the smooth surface. My husband cut a door out of one side of the barrel (I don't trust myself with a circular saw), and he picked me out some shiny, heavy-duty hardware for the latches and hinges.


Here's the finished door- The hardware will definitely keep anything from falling out while the tumbler is spinning! My hubby even installed a handle for easy access...


Well, here's the finished project! I dug 2.5Ft holes and placed my posts in a bed of concrete to keep them stable. This will give me plenty of room to park a wheel barrel underneath when I'm ready to harvest my rich, homemade soil!

From wrestling with citrus trees to building my own compost tumbler, I think this was one of my most productive projects yet!

This post was shared on Monday Mania at the Healthy Home Economist.

Monday, August 22, 2011

Chickens Are NOT Vegetarians, A Rant :)

After having observed our chickens for a month, and having seen them eat anything from kitchen scraps to snakes, I have come up with a pretty reasonable conclusion... chickens are definitely NOT vegetarians. My chickens are spoiled, all things considered. I let them out of their very safe and secure coop every morning to free-range all day long. They are cuddled by my children and given a large variety of treats, such as cherries, apples, coconut, and beef fat (which they LOVE). My chickens are happy! I can't help but feel sorry for the chickens who are kept by the commercial, high-producing, mega chicken farms.

While waiting for my chickens to start laying eggs, I have been forced to shop at the supermarket for them. Ugh. I can't tell you how disappointed I am in the lack of quality of store-bought eggs... even the organic kind! The 4-grain, all vegetarian diet eggs are my least favorite. Since chickens are naturally omnivores, a 4-grain diet would be like a human choosing 4 things to eat for the rest of his life! If you were only allowed to eat 4 grains, that would be a very bland, not to mention nutritionally deficient diet. If 4-grain eggs come from nutritionally-deficient chickens, how can they be healthy??

Solution: keep your own chickens, if you are able. If you can't keep your own, find a local farmer who lets his chickens eat the diet God intended them to eat! I have gotten eggs from a local farmer for as little as $2.00 per dozen... quite a discount from those inferior, organic eggs at the grocery store.

How to tell if an egg is of good quality:
1.The white of the egg should be clear, not cloudy.
2.The yolk of the egg should be yellow-orange, not a pasty light yellow.
3. The shell should be thick and hard to crack, not flimsy and fall-apart-in-your-hand.

If you can find an egg supplier who's eggs fit all of the above criteria, you have done your family a great service. Better nutrition and happier chickens definitely make higher-quality eggs that your family will love!

Saturday, July 30, 2011

Homemade Beef Stock


This is not your typical grocery store stock! The stock that you find in the store will be loaded with MSG and other unwanted additives... and it will be watery with very little nutritional value.

On the other hand, homemade stock is loaded with nutrition. You control what goes in it (and what doesn't!). And, if you make it right, homemade stock is full of gelatin- just look at the picture. Gelatin is essential for joint health, and may reduce the risk of stomach ulcers.

For my homemade beef stock, I placed in my 7-qt. stock pot:

1 package marrow bones
1 package ox tails
1 package meaty ribs
1 package neck bones
2 calf hooves

I then covered the bones with water (just a couple inches below the lip of the pot), added about 2 T raw apple cider vinegar, and let it sit for 30 minutes.

Next, I brought it all to a boil and spooned out the foam that came to the top. After that, I added 1 med. onion (roughly chopped), a couple cloves of garlic, four carrots (roughly chopped), and about 1t pepper corns and 1t sea salt. You can adjust the seasonings to your taste.

Now comes the waiting! Turn down the heat to a low simmer, cover your pot, and let the stock cook for 24-72 hours. The longer you let it cook, the stronger the flavor and the darker the color.

When the stock is done to your liking, strain off the chunky stuff and store in the fridge overnight. In the morning, spoon off the fat that has congealed on the surface. I fed the fat to my chickens and they loved it!

Now, the stock is ready for storage- it will keep for days in the fridge, or for months in the freezer. Since I always make large batches, I store mine in 2-cup containers in the freezer. Then, it is easy to take out and thaw when I need it! This stock makes great soups, sauces or can replace water in your favorite recipes (rice cooked in stock is delicious!).

Because of the calf's hooves, my stock is loaded with gelatin! My kids took turns twisting the bowl to watch it jiggle :) Enjoy!

Monday, June 13, 2011

Homemade Grahams

My family loves graham crackers... the only problem is, all the grahams at the store contain soy products and /or hydrogenated oils! The organic kinds cost double, so they are out of the question...

After searching the grocery store shelves for an affordable, healthy choice of grahams (and failing to find anything), I decided to make my own :)


This is a recipe that I formulated myself, after having viewed quite a few recipes online. My family thought they were really good, with just the right texture and sweetness!

Ingredients:

1/2 c butter
1/4 c packed brown sugar
1/4 c honey
1 t vanilla extract
2 c sprouted wheat flour
1 c unbleached flour
1 t baking powder
1/2 t baking soda
1/4 t salt
1/2 c milk

Directions:

Cream together the butter, sugar and honey. Stir in vanilla and milk.

Mix together the flours, baking powder and soda, and salt.

Combine the two mixtures until incorporated. I had to knead on a floured surface to get them into a nice dough.

Chill dough until firm (from 1-4 hours)

Preheat the oven to 350 F. and grease cookie sheets (I used coconut oil).

Roll dough out to 1/8" and cut into rectangles. I scored the dough to look more like store-bought grahams. Place grahams 1/2" apart on cookie sheets.

Bake for 10 to 12 minutes, until browned on edges and crisp.*

*Before baking, you may sprinkle with a little cinnamon-sugar for a sweeter treat.

Enjoy ;)

This post was shared at Monday Mania at the Healthy Home Economist

Thursday, April 28, 2011

Homemade Turkey Pot Pie

Even though it has been in the high 80's here lately, I still like a hot plate of food for dinner! Pot pies have been one of my favorite meals for years, and they are definitely hot- not to mention creamy, meaty, filling, etc. And, pot pies are the perfect way of bringing an entire meal to the table in one dish. Since I roasted a turkey for Easter dinner, I had enough left-over meat to fill two pies!


My favorite pie recipe calls for chicken, but turkey can substitute very well!

Filling:

3 cups cooked, diced chicken or turkey
1 1/2 c chicken, beef or turkey stock (preferably homemade!)
1 t dried basil
1 t dried rosemary
1 t dried thyme
3/4 t salt
1/4 t black pepper
1 c cubed potatoes
1 c chopped celery
1 c sliced carrots
1 med. onion, chopped
1/3 c butter
1/2 c flour
3/4 c raw cream
3/4 c raw milk

Pour stock into small saucepan with basil, rosemary, thyme and salt. Heat to boiling, then reduce heat and cover. Simmer while you prepare the rest of the filling (about 15 minutes).

Melt butter in deep skillet and saute potatoes for 5 minutes.

Add celery, carrots, and onions to potatoes and saute for 5 minutes.

Mix flour with veggies and stir over heat for one minute.

Strain the stock and add it to veggies, then add pepper, cream, and milk to mixture.

Cook until thick and bubbly.


Crust:

3 c flour
1 t salt
1 c coconut oil (solid, chilled)
1 large egg
1 T white vinegar
1/4 c water
1 egg + 1 T milk for crust browning

Mix flour with coconut oil and salt until crumbly.

Mix egg, vinegar and water in a separate cup, then sprinkle over flour mixture.

Use hands to form dough into ball (add water by sprinkles, if needed).

Roll out 2/3 dough to 1/8" to fit in bottom and sides of a 8"-round casserole. Press into corners.

Fill the casserole with the prepared filling, then roll out the remainder of dough to cover the top of the pie. You can weave strips of dough or cut out shapes in a solid top crust. Brush the top crust with 1 egg mixed well with 1 T milk.


Bake in a pre-heated 400 F oven for 35 minutes, or until browned and bubbly.


Enjoy!

Thursday, April 21, 2011

Homemade Hummus

I love this homemade hummus! It is great with crackers, melba toast or pita bread... the taste is mild, so you could really use this as an all-purpose dip :) I do not like the tartness of many store-bought brands, so I add a little raw honey to cut the tart flavor- but not enough to be overpoweringly sweet. Also, I buy my garbanzo beans dried, not in a can. This guarantees that the beans are soaked properly to neutralize their natural enzyme inhibitors!


What you need:

6 oz dried garbanzo beans (plus, 2 T whey or lemon juice)
1/2 c tahini paste
3 T olive oil, plus a drizzle for presentation
2 large cloves garlic
1 T raw honey
1/3 c lemon juice
1 t ground cumin
salt to taste

Soak beans overnight with enough water to cover them and 2 T whey or lemon juice.

Drain and rinse beans, then cover with water and boil until tender (up to 2 hours).

Drain beans, reserving bean broth.

Place beans in food processor and blend with garlic and oil (add enough broth to make a creamy paste).

Add rest of ingredients and blend until incorporated (add more broth until desired consistency).

For the presentation, put the hummus in a shallow bowl or plate and drizzle with olive oil. I also sprinkle mine with paprika! Enjoy.

Tuesday, April 19, 2011

Homemade Chai Tea Blend

I gave up having a daily cup of coffee a while back... but I still enjoy a hot, creamy beverage every once in a while :) One of my favorite hot drinks is chai tea- it's hot, spicy, creamy, and as sweet as I want to make it! Here's my version of this wonderful, tasty beverage that is sure to put a smile on your face:


Chai tea mix:

3/4 c black tea (or red rooibos, for a caffeine-free treat)
4 cinnamon sticks, chopped
1 organic orange peel, dried and broken in small pieces (in your oven: bake at 250 F for about 15-20 minutes, until crispy.)
1/4 t crushed black peppercorns
1/4 t crushed cloves
1 t fennel seeds
1/4 t cumin seeds
1 t dried, chopped ginger
bay leaves (about 1 per cup of water)

Mix all ingredients and keep stored in an airtight jar.

To make tea:

Heat 1T (heaping) chai mix (plus 1 bay leaf) with 1 cup water. When mix reaches boil, cover and remove from heat. Let steeep for 10-15 minutes.

While tea is steeping, steam/heat one cup milk + 2 t honey or brown sugar.

Mix equal amounts milk and strained tea in large mug and enjoy!

This post is shared on Monday Mania at the Healthy Home Economist.

Wednesday, April 6, 2011

Homemade Mousse au Chocolat

When my daughter was planning her birthday party menu, this chocolate-y dessert was on top of her list. With a mixture of pastured eggs, raw cream, chocolate and very little sugar, it was something I could definitely say "yes!" to...


What you will need:

12 oz dark chocolate (preferably 70%-80% cocoa content. We chose Hageland "Uganda" Belgian chocolate, which is 80% cocoa.)
1/2 c raw milk
4 T organic powdered sugar
6 eggs-separated
dash of salt
3/4 c raw cream

Melt the chocolate with the milk in a double boiler over low-med. heat, then transfer to large bowl.
Beat the 6 egg yolks with the sugar until creamy yellow-stir them into warm chocolate mixture. Beat the 6 egg whites with a pinch of salt until stiff peaks form- fold into chocolate mixture.
Beat the cream until thick-fold carefully into chocolate mixture.

When everything is mixed, cover and chill in refrigerator for at least 4 hours. We left ours in the fridge overnight, and dug into it the next day. Wow! This mousse is just sweet enough and bursting with chocolate-y goodness.

Note: When I was in high school, our family hosted a Belgian exchange student. She made this dessert for our family and friends, and I fell in love with it! This version of Aurore's mousse au chocolat is just as good as I remember :)

Saturday, March 19, 2011

Homemade Gluten-free Strawberry Pie


The kiddos and I went on a homeschool field trip to a local farm this week. We picked 20lbs of the sweetest organic strawberries I have ever tasted! The farmer told us they were of the Radiant variety- juicy and sweet.
I am going to make some strawberry preserves next week, freeze some for smoothies and milkshakes, add some to my homemade kombucha, and today I made a gluten-free strawberry pie! I used coconut flour for the crust, and cut the sugar content in half to let the natural sweetness of the strawberries shine.


Here's a crust recipe that I modified from http://www.tropicaltraditions.com/:

1 1/2 c coconut flour (make your own Homemade coconut flour)
2 eggs
1 t honey
pinch of salt
1/4 c + 2 T melted butter
1 T water

Pre-heat oven to 350F.

Mix first 4 ingredients well, then add butter and water. Mix thoroughly.

Press into a 8"x 11" pan.

Bake for 15 minutes, or until browned.

For the filling, I modified a recipe from Talk About Good, published by the Junior League of Lafayette, LA.:

about 1 qt strawberries
1/2 c sugar
3 T cornstarch
8 oz cream cheese + 3 T milk
freshly-whipped cream

Process cream cheese and milk in small food processor until spreadable consistency.

Spread mixture on finished coconut flour crust.

Set 1/2 of strawberries closely on top of cream cheese, use more if needed.

Mash rest of berries in medium saucepan(add more if you used more than half on previous step.).

Add sugar and cornstarch to strawberries and bring to boil. Cook until hot and thick, stirring constantly.

Cool mixture slightly, then pour over berries in pan. Spread to even thickness.

Refrigerate for at least 2 hours.

Serve topped with whipped cream.


Here's the strawberry kombucha that I have fermenting on my kitchen counter! I have already tasted it, and it is delicious! I now have a new favorite flavor!

This recipe was shared at Monday Mania at the Healthy Home Economist.

Wednesday, March 16, 2011

Homemade Sourdough Pancakes


I was rummaging through my kitchen cabinet the other day and found a series of cookbooks that my mother-in-law gave to me many years ago. I never realised what a treasure they were! Women's Day Encyclopedia of Cookery is a great set of books to have around. The set I have was published in 1966, and most of the recipes use butter and other "old-fashioned" ingredients. There are not only recipes in these books, but whole cookbooks on specific ingredients such as onions and peanut butter, or ethnicities such as French and Norwegian! These books also have definitions for culinary lingo and procedures. What a find-and in the back of my own cabinet!

The first Women's Day recipe I am going to try is sourdough pancakes! I have modified the recipe slightly to my own tastes, but the idea is the same :)


To 2 cups of your sourdough starter, add one cup each of flour and water. Let it sit overnight.
In the morning, add 1 T rapadura, 1/2 t baking soda, 1/2 t sea salt and one beaten egg.
Mix with 2 T melted butter and let it sit while griddle heats up to about 350 degrees F.


Cook on hot griddle until browned on both sides.
While my pancakes were cooking, my kids asked me if I was making popcorn for breakfast! The smell is similar :) The taste is delicious! They are slightly sour, but when loaded with butter and maple syrup they make a satisfying breakfast. I was able to eat these pancakes without the feeling of heaviness I sometimes get in my tummy, and they are very filling and full of energy.
Enjoy!

Sunday, February 27, 2011

Homemade Bar Lotion

I use lotion every day. During the winter, when we have to turn on the heat occasionally, my skin needs that extra moisture even more!

I have made cream lotions, but they actually contain more water than oils! I find the moisture is short-lasting, although easily absorbed into the skin. For winter moisture, I prefer bar lotions. This type of lotion is not watered-down at all! It is 100% natural oils that moisturize your skin to the fullest, and they take very little effort to make.


I can make 4-1.5 oz bars from this simple recipe:

1.5 oz beeswax
1 oz cocoa butter (very moisturizing, and good for scarred skin, too!)
1.5 oz Shea butter
2 oz liquid oil (either olive oil or avocado oil)

Melt oils and beeswax in a small saucepan over low heat.
Remove from heat and add 1/4 t vitamin E and about 5 drops of your favorite essential oil
Pour into molds and let harden! If they get stuck in the molds, simply pop them in the freezer for an hour or so.

To use:
Rub the bar in your hands to warm.

I have used this as a facial moisturizer, and it works great on feet and elbows, too!

This post has been shared at Monday Mania

Saturday, February 19, 2011

Homemade Beef Stroganoff

I have to admit, when I was a new bride I couldn't cook worth a darn. Boxed dinners were my crutch, and "homemade" was not a word used in my home... My husband is a "meat and potatoes" man, so I was always searching for something to mix with hamburger, and boxed dinners were sooo convenient!

Twelve years later... I have learned from my mistakes and added "homemade" to my cooking repertoire. My Mother-in-law has taught me how to cook my husbands favorites, and I have changed up the recipes on quite a few to make them more nutritious. I'm learning all the time.

My husband is still a "meat and potatoes" man, so I'm always looking for yummy, meaty recipes for us to try. Beef Stroganoff has always been one of our favorites, and it is very nutritious if you make it with organic vegetables and homemade broth. (Not to mention a great way to boost your immune system this flu season!)


What you need:

1.5 lb lean beef, cut in strips 1/4"-1/2" thick and about 2.5" long x 3/4" wide
5 T butter, divided
1 c sliced mushrooms (I omit these, as my family won't eat them!)
1 medium onion, chopped
2 T flour (or 2T arrowroot powder + 2T water)
2 c beef stock
2 T tomato paste
1 t dry mustard
2/3 c sour cream
sea salt and black pepper

Dust strips of beef with sea salt and black pepper, then let them sit while you prepare the vegetables.

Melt 2 T butter in a heavy skillet, and saute mushrooms until tender. Remove and set aside.

Melt more butter, if needed, and saute onion in same pan until caramelized. Remove and add to mushrooms.

Add at least another T butter to skillet, then brown meat on both sides in small batches.

(Add butter when needed.) Remove beef and set aside with mushrooms and onion.

Add 2 T flour to skillet and mix with meat drippings and left-over butter. Brown it well, mixing constantly. (If you prefer to use arrowroot powder, add 2T arrowroot mixed with 2T water after simmer.)

Slowly add 2 c beef stock to form a smooth gravy.

Add tomato paste and mustard, blending well.

Next, add meat, mushrooms and onion and let simmer on low heat, covered, for about 20 minutes. (Add 2T arrowroot + 2T water now, if desired)


Five minutes before serving, add the sour cream and blend thoroughly. Season with sea salt and black pepper, if desired.

Serve over long grain rice or mashed potatoes!


Saturday, February 12, 2011

Salt Is GOOD For You!

A friend of mine is trying so hard to lose a little weight. She has succeeded in losing 30 lbs already! But, now that most of the weight is off, her blood pressure is high. Her problem reminded me of an article I read about refined salt and its effects on the body. I asked her what kind of salt she used, and sure enough, she showed me a container of processed "sea salt".
Just because it says "sea salt", don't think it's any better than the cheaper "table salt" that is sold on the same shelf! If it is white, chances are it has been stripped of its trace minerals. A simple rule to go by is: Don't buy white salt. The salts I use are pink and grey...

Salt (in moderation) is actually good for you. I am talking about the God-given, natural, mineral-rich salt that comes from our Earth's many salt deposits and oceans. The only thing it has in common with refined, white salt is that it also contains sodium chloride. That is where the similarities end.

In Debbi Pearl's article, Salt is Good , she explains that high blood pressure (as well as other conditions) is brought about by a mineral imbalance. This imbalance is caused by eating refined, mineral-stripped salt and products that contain refined salt. It makes total sense to me! Natural, unrefined salt has minerals that help your body function- without these essential minerals, how can you expect your body to function as it should?


Trace minerals are necessary for your body to function properly. Redmond Real Salt, a pourable, pink salt from an ancient sea bed in Utah claims to have over 50 minerals in addition to sodium. This is the salt I serve to my family in a shaker on the table. It not only seasons their food but gives them many trace minerals without having to swallow a pill.


Celtic Sea Salt is a grey salt made in northern France from sun dried ocean water. It is the chosen salt of gourmet chefs. I have used this salt for cooking in liquid because the crystals can be very large and season best when dissolved. It is not ideal for putting in a salt shaker, and can stick together because of its high moisture content. Celtic salt contains all 82 of the essential trace minerals a body needs to function properly! It replenishes electrolytes to prevent dehydration and can be good for digestion.

I use unrefined salt to keep my body in balance. Try it and you'll see!

For more information on salt, please read this article by Jon Barron, author of Lessons From the Miracle Doctors- A Pillar of Salt


disclaimer: I am not a doctor. I urge you to do your own research on salt before making any dietary changes for yourself or your family.

Saturday, February 5, 2011

Homemade Steak Seasoning/Horseradish Sauce

Wow. My husband whipped up a delicious dinner tonight! Yes, he cooks too, only his kitchen is in the back yard... Tonight we had steak with "Outback"-style seasoning and a horseradish-dill dipping sauce. If you enjoy the taste of Outback steaks and Tiger Dill sauce like we do, you will LOVE this healthier homemade version!

Steak seasoning:

2 t fine sea salt
1 t paprika
1/2 t black pepper
1/4 t onion powder
1/4 t garlic powder
1/4 t cayenne pepper
dash coriander
dash turmeric

Mix spices well.
Sprinkle generously on both sides of steak and let sit 10 minutes before grilling.

Horseradish Sauce:

1/2 c sour cream
1/4 c prepared horseradish (I used Gold's Horseradish- it was the ONLY one at the store with no preservatives or MSG!)
about 1 t dried dill weed (taste and add more, if desired)

I ate this sauce on my very rare steak tonight, and it was like eating a little bit of heaven!
Enjoy!

Note: You can google any of your favorite chain restaurant's recipes to find copycats. I have done this with salad dressings and meat seasonings. Then, all you have to do is substitute real, healthy ingredients and make it better at home! (For instance, substitute coconut oil for vegetable oil, sea salt for processed salt, or butter for margarine- it's that easy!)

This post is part of Monday Mania on the Healthy Home Economist

Saturday, January 29, 2011

Homemade Stevia Extract

In his book, Healing with Whole Foods, Paul Pitchford warns, "Obtain only the green or black (whole) stevia extracts or powders; avoid the clear extracts or white powders, which, highly refined and lacking essential phyto-nutrients, cause imbalance."


Stevia is a miracle of natural sweeteners. While it is 30-300 times as sweet as granulated cane sugar, it has NO calories and is safe for diabetics! If extracted correctly, there is very little to no aftertaste and it can be stored in your refrigerator for up to three months.

When choosing an herbal extract at the store, observe the color of the extract. Good quality extracts will be from green to almost black in color, and they will be packaged in dark-colored glass bottles. As mentioned above, do not buy refined stevia- clear extracts and white powder stevia have been refined. It is hard to tell the age of an extract, except by the expiration date on the bottle. For this reason, I like to make my own, fresh extracts!

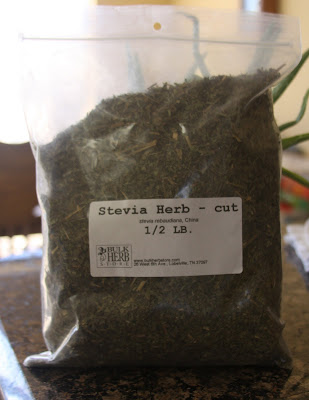
I got a bag of dried, organic stevia from my favorite online herb store (http://www.bulkherbstore.com) a while back, and I meant to do something with it... why not now!?
For those of you who followed my other blog, you know that I have made extracts from medicinal herbs. They usually take 3 weeks to reach full extraction. Since I am only extracting the sweetness factor (and NOT the medicinal properties) of the stevia, it will take much less time! You will only need to dedicate about 2 days from start to finish.

What you will need:

clear alcohol (eg. rum, grain alcohol or vodka)
1 jar with a tight-fitting top
dried stevia herb
cloth or coffee filter
small-med. cooking pot


1. Fill your jar about 1/3 of the way with dried stevia. The size of the jar doesn't matter!

2. Fill your jar to within about 1"-2" from the top with whatever alcohol you have chosen.

3. Screw on the top and shake, then leave the jar on the counter in your kitchen.

4. Agitate the jar several times over a 48 hour period. Every time you walk by, give it a shake!

5. Filter your extract through a cloth or coffee filter into a cooking pot.

6. Bring your extract to a simmer for about 30 minutes. This will boil off the alcohol and condense the sweetener.

7. Store your extract in the refrigerator for up to 3 months!


My final product was almost black, with a green tint to it. Total time spent on this extract was: 48 hours on the counter + 30 minutes simmering, and it will last for 3 months stored in the fridge!

Be sure to test your extract to see how much you will need for coffee/tea. Start with small portions (use an eye dropper- you can find them in the pharmacy), as 1t stevia extract =1 cup granulated sugar in concentrated amounts!

Wednesday, January 26, 2011

Homemade Hair Detangler

My oldest daughter used to have hair down to her bottom, and boy was it hard to keep neat! It didn't help that she didn't like having her hair brushed. We got store-bought detangler and it worked, but I didn't like the ingredient list one bit. Really, there was more than one ingredient I couldn't even pronounce! I was inspired to make my own detangler when I came across an herbal product online called "Hair Shine" by http://www.beeyoutiful.com/ ...


In my homemade detangler, I use:
2 oz aloe gel (try to find the purest aloe you can- NOT the green aloe for sunburns.)
5 oz distilled water
20 drops orange essential oil
20 drops lavender essential oil
8-10 drops rosemary essential oil
4 drops grapefruit seed extract (optional- for freshness)
I re-used an old detangler spray bottle (I've used the one in the picture for about 3 years!) to mix all the ingredients together. This concoction is best when used on dry hair, in between washings. Shake well before use :)

Friday, January 21, 2011

Homemade Sunscreen

We are having a homeschool field trip to Sanibel Island this week, and I noticed that we have used up all of our sunscreen. Although some sun exposure is good for your vitamin D levels, spending all day at the beach with no sun protection is a sunburn waiting to happen.

Drugstore sunscreen is no longer allowed in my home because of the chemicals used in them. These chemicals actually penetrate your bloodstream and flow through your body- I would rather use a sunscreen that protects my kids from the outside.


Here are the ingredients for my homemade sunscreen:

48 g liquid oil (I use either sweet almond or olive oil)
52 g coconut oil
20 g emulsifier (this is to mix the water and oil)
10 g stearic acid (this is a thickening agent)
380 g water
35 g zinc oxide- at this amount, the sunscreen will be approx. SPF 20
10-20 drops essential oil (NOT sweet orange, which can make your skin sensitive to sunlight.)


Heat all ingredients except zinc oxide and essential oil in a stainless steel pan until hot but not boiling. Then, mix with a stick blender until everything is incorporated and creamy- be careful as this mixture will be hot. Once it is mixed, you can add your zinc oxide and mix again with the stick blender. If you are adding essential oils, wait until the mixture has cooled to add them.


Here is the finished product! It is thick and looks a lot like store-bought sunscreen. This is not completely waterproof, so re-apply after swimming!


I put my sunscreen in a recycled lotion bottle with a pump. This makes it easier for the kids to re-apply themselves!