Pages

Showing posts with label soap. Show all posts

Sunday, April 26, 2015

Homemade Cream Conditioner and Liquid, Hot Process Shampoo

The Shampoo:

Although I love my henna shampoo bar, I was curious about making more liquid shampoo- not from an already-made soap like Dr Bronners, but from scratch.  I have made liquid soap before (click here for the post), but I wanted to use oils that could be used for moisturizing shampoo and infuse it with essential oils that would promote healthy hair.  Since my hair is thin, I chose a juniper berry/spearmint scent for the shampoo.  Juniper berry essential oil is one of the essential oils that actually promotes new hair growth :)  I just like the smell of spearmint!  I also didn't want to make the recipe too complex or I would only make it once... so, I chose oils that would be easy to find and kept the list at a minimum.

Here's my recipe for hot process shampoo (which could also be used as body wash!):

17.5 oz castor oil
17.5 oz coconut oil
22.5 oz sunflower oil

24 fl oz distilled water
12.8 oz KOH (potassium hydroxide)

1 gallon distilled water for dilution (yes, this make a LOT of shampoo)

1-2 oz essential oils (optional)- I used a 60/40 mixture of spearmint/juniper berry

I followed the instructions (with pictures) found on these Instructables directions :)  This is the best tutorial I have found regarding liquid soap.  Very easy and concise!   Although my cook time differed from the Instructables author, the process is the same.

A few notes:

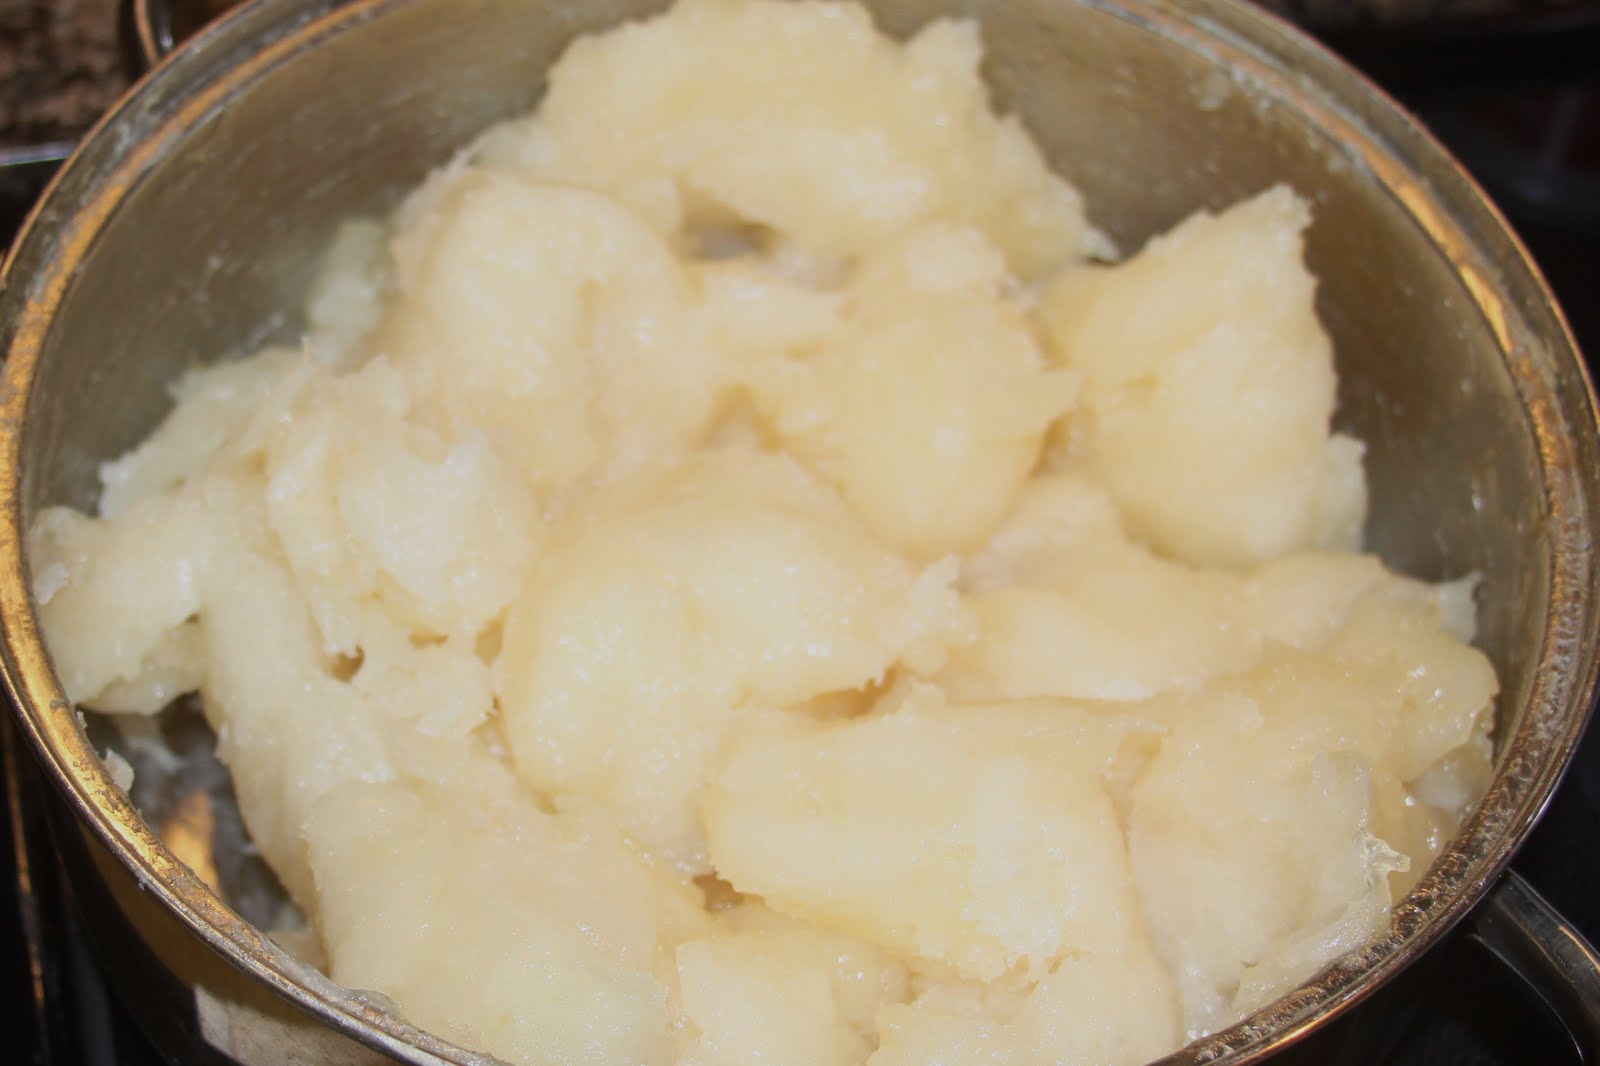
  • Do not worry if you don't see every stage of liquid soap!  My soap passed by the "mashed potato" stage so quickly I didn't even see it...
  • I ended up cooking my soap for 7 hours before I felt it was clear enough.  
  • I did NOT add borax at the end because I was at a 3% superfat in my recipe- no excess lye needed to be neutralized in the finished product!


The Cream Conditioner:

I used to use a vinegar rinse as a conditioner, but I was never very fond of the smell or the difficulty with getting it through all of my hair.  It was also very cold when applying in the winter months- yikes!

I wanted to continue with the healthy/new hair growth theme of my shampoo, so I concocted a mixture of essential oils for that purpose.  Some essential oils you may want to try include:  ylang ylang, clary sage, lemon, rosemary, basil, cedarwood, cypress, peppermint, or a mixture.  Mine had a little bit of everything in it, and it turned out very sweet and herbal!

Here is the recipe that I found on www.brambleberry.com:

374 g distilled water
2 g liquid silk
22 g glycerin
27 g emulsifier
13 g jojoba oil
4 g sweet almond oil
4 g essential oils
( I did NOT add the preservative)

Heat all the ingredients (except essential oils) until solids have dissolved.
Hold that temp for 10 minutes.
Cool to 140 degrees before adding essential oils.

A couple notes:

  • I had to use my stick blender to get the fixed oils to incorporate completely.  Just be careful while the mixture is hot!
  • pour into a pump bottle immediately after adding the essential oils, as this will be hard to do once the conditioner is completely cooled.

The results:


I am very pleased with this shampoo/conditioner combo!!  Even my husband (who doesn't always like my concoctions) praised these products!!  Andy has hair past his shoulders and always has a hard time brushing his hair through when it's wet- with this combo, his hair is knot-free and shiny :)  I've recently had a major hair cut, and although I do not need detangling, my hair is soft and full of body.

Although the process of making this shampoo is a bit more time-consuming than the henna shampoo bar, it is well worth the effort!  And, since this recipe makes so much, you only have to make it every few months!  As far as the conditioner goes, I cannot think of an easier way to make anyone's hair soft and shiny- and no vinegar-y smell in your shower!  Enjoy!!

Saturday, February 23, 2013

5 Steps to a Chemical-Free Morning Routine

I love to use products that I've made myself.  No label-reading necessary, because I know exactly what is in them.  And, my friends are always willing to be guinea pigs for my homemade concoctions, so I get free feedback from them.  If something doesn't work for any or all of them, I can make adjustments until it is perfect! 
 
In this post, I am going to share with you 5 easy steps to make your own chemical-free bathroom products- just imagine, a morning routine that doesn't involve bathing yourself in chemicals and synthetic perfumes!  


Step One:  Make your own tooth powder!! 
Did you know that, historically, fluoride has been added to water supplies as a poison?  Yes, fluoride is a toxic chemical that has been forced upon us in drinking water and conventional toothpaste.  You can take my word for it, or do your own research (here's a good article, or this one). Here's the good news: you can rid your life of fluoride-ridden toothpaste!  Make your own tooth powder :)  Here's the recipe I use every day:

Tooth Powder
2 T aluminum-free baking soda
1 t fine sea salt
1/2 t cinnamon
1/8 t clove powder-or-5 drops clove essential oil

Mix ingredients well and keep in a sealed container.  To use:  wet your tooth brush, then dip bristle tips into powder.  Brush as usual.  This powder will not only clean your teeth but give you fresh breath as well!

Step Two:  Make your own deodorant!!
Please read the ingredients label on your stick of conventional deodorant.  First off, can you identify all the ingredients?  Didn't think so.   The worst ingredient in conventional deodorant (in my opinion) is the aluminum.  I read an article recently that said 100% of malignant breast tumors contain aluminum... where would the tumors absorb this aluminum?  My guess is:  conventional deodorant! 

Although "natural" deodorants work, I am still not convinced that they are totally safe.  Better safe than sorry- make your own!!  Here's the recipe I use every day:

Deodorant Paste
3 T coconut oil
2 T shea butter
1 T beeswax
4 T aluminum-free baking soda
essential oils (about 5-10 drops)

Melt your oils over low heat (heat until beeswax is completely melted).
Add baking soda and stir... and stir... and stir until everything is mixed thoroughly.  You can take breaks in between stirring.  When mixture has cooled and started to solidify, you can add your essential oils (I like orange and ginger).  Store in a cleaned deodorant tube or a small pot in your bathroom.  This can be spread on or rubbed in with your fingers.

Step Three:  Make your own lotion!!
Once again, read your labels!  Store-bought lotion is nothing but chemicals with a little oil thrown in.  Do you really want to slather chemicals on your body right out of the shower?  That doesn't sound too clean to me.  Here is a very simple recipe that I use every day (including on my face):

Body Butter
3oz shea butter
3oz cocoa butter
3oz coconut oil
3oz almond or grapeseed oil
essential oils (optional)

Melt solid oils over low heat, then let them cool for 30 minutes.
Add liquid oil and any essential oils for scent.
Chill until mixture starts to solidify.
Whip with a hand mixer until light and fluffy!
You can store this in your bathroom in a sealed container, as long as it doesn't get too hot.

Step Four:  Make your own shampoo and conditioner!!
Check out my recent posts on liquid shampoo and vinegar rinse and henna bar shampoo!
Store-bought shampoo has lots of chemicals- some for lather, some for shine, some for sensitive scalp, etc.  If you just use a homemade, chemical-free shampoo, you will have lather, shine and a healthy scalp, and without all those added chemicals :)

Step Five:  Make your own soap!!
This is  a big step, but I know you can do it!  There are many how-to videos and instructables online that teach soap-making basics.  I have also done a detailed post on making goat milk soap.  If you are not comfortable making your own, just be careful when buying soap at the store.  Pick soaps that do not have synthetic scents and chemical additives.  Some skin problems, like eczema, are aggravated by harmless-looking ingredients and fragrances.

If this list looks very daunting to you, just take it one step at a time!  Try one recipe per week, or two if you're feeling motivated :)  You can rid your life of chemicals and feel good about doing it.  Enjoy!

Friday, January 18, 2013

Homemade Henna Shampoo Bar


A few years back, I found and printed out a recipe for a shampoo bar.  It interested me, but I had my favorite store-bought shampoo and was unwilling to give it up... now, after trying my hand at liquid shampoo, I am ready to take it to the next level :)  Although I was satisfied with the liquid shampoo,   I was curious to try a shampoo bar on my fine, thin hair.  With the liquid shampoo, my hair is left a bit heavy, like I used a little too much product when styling it- even when I let it air dry with no product whatsoever. 

With the shampoo bar, my hair is shiny, light, soft and manageable!  Here's a picture of what my hair looks like after washing with the bar, using a vinegar rinse, and air-drying (keep in mind that I have not been kind to my hair in the recent past):


The original recipe that caught my eye so many years ago was from the Snowdrift Farms website, which has since shut down.  I changed the oils to suit my needs, and added henna leaf powder and coconut milk to improve the health of my abused hair and scalp.  Here is my revised shampoo bar recipe (oil and lye measurements are by weight, milk and water are fluid oz.):

Oils:
15 oz coconut oil
12 oz macadamia nut oil
6 oz castor oil
4 oz palm oil
3 oz jojoba oil

Lye (NaOH)
5.5 oz.

Liquids:
5 fl oz coconut milk ( I used canned., organic milk)
10 fl oz water ( I froze the water before adding lye)

At trace, I added:
1 oz henna leaf powder
0.4 oz chamomile flower powder
0.4 oz silk protein liquid
splash rosemary essential oil

While the ingredient list is extensive, this recipe is well worth the trouble!  
You make the shampoo bar just as if you were making lye soap.  

**If you need detailed directions, please see my other post on making  goats milk soap.  The only difference would be that I added the coconut milk directly to my heated oils and mixed the lye with the ice/water.**

I am so happy I found a more natural way to make my hair look healthy.  No more crazy, long chemical names on my shampoo bottles- and no more bad hair days, either!  Enjoy!

For other shampoo/conditioner recipes, chose a type:
hot process liquid shampoo and cream conditioner
liquid shampoo and vinegar rinse

Wednesday, December 26, 2012

Homemade Shampoo and Conditioning Rinse


I am really excited about this post!  Homemade shampoo has been on my list of "things to do" for quite a while, but I hadn't found a recipe that really caught my eye until now.  (Check out the inspiration for this post at Instructables!)  The recipes are simple and can be tailored to any type of hair. 
 
My hair is fine and thin, so I paired my homemade shampoo with a vinegar rinse.  The rinse will help with any heavy feeling that is left after shampooing.  Without the rinse, my hair feels like I have a lot of product in it- even though I could use some body, I cannot use this shampoo without a rinse.  
 
I have a good friend who has naturally curly hair, and she uses her normal conditioner with this shampoo, with excellent results!  She told me her hair feels light and clean, just like after a trip to the salon :). 
 
Here's what you'll need for your own homemade shampoo:
 
1/2 c castille soap (I used Dr Bronners Citrus Hemp Castille Soap)
1/2 c water
2 t jojoba oil
2 t glycerine (I used a homemade green tea extract in glycerine)


Mix all ingredients in a large, glass measuring cup, then pour into dispensing bottles!  Make sure to shake well before using.  I squirt this directly into my wet hair, as it is very watery (but it makes amazing lather!).

For a vinegar rinse, just use 1 quart water (or tea- I used a strong linden leaf tea) and 3/4 c vinegar (you can use whatever kind you have on hand- I used apple cider vinegar).  Mix.

Use 1/2-3/4 c per rinse- just work through your hair to your scalp and leave it on while you wash your body.  Then, rinse and let your hair air dry!  When it's dry, no vinegar scent :)  Enjoy!

Thursday, March 8, 2012

Homemade Raw Goat's Milk Soap

I am a soapmaker. It is not a career for me, just a very satisfying hobby. I get special orders from friends once in a while, but usually just make soaps for my family to enjoy. I first started making soap about the time that Hurricane Katrina came through New Orleans... my hubby was working with the clean-up efforts, I was home with 4 small children and needed an activity to keep me sane. :) Soapmaking found me, and I've been enjoying it ever since!

Recently, I became aware of a local goat dairy from which I could get raw milk- was I excited! I have made soap with canned goat's milk, but it's just not the same; even the technique to making the soap with raw milk is different. If you have ever made soap before, here's a recipe that you will thoroughly relish:

Fats:
20 oz coconut oil
20 oz olive oil

Liquid:
12 oz goat's milk, frozen and broken apart.

Lye:
6.08oz sodium hydroxide (NaOH)


The reason you need to freeze the goat's milk is that the NaOH will burn it otherwise. If you have ever burned milk, you know that it isn't pleasant- and the soap will be ruined! What's great about this technique is that the lye solution doesn't even get above 100 degrees, so as soon as the oil is heated to the correct temp. it's time to mix! No waiting needed.

Step 1: Mix your NaOH into the frozen goat's milk. **Please use precautions when handling lye, as it is caustic and can cause serious burns. Use eye protection and long gloves to protect any exposed skin.** Once the milk is thawed, leave the lye solution in a protected area.

Step 2: Heat your oils to about 100 degrees. This will not take long at all :)

Step 3: Mix the lye solution into the heated fats in a stream no larger than a #2 pencil. Stir with a metal spoon until incorporated.

Step 4: Using an immersion blender, mix the soap until a light trace (thin pudding consistency). Add any additives at this point, then mix until incorporated. I used about 0.3 oz ground lavender buds and 0.7 oz lavender essential oil.

Step 5: Pour your soap into a prepared mold. I used a commercial-grade 9x13 baking pan, lined with plastic. Cover your soap with plastic and wrap your mold in a blanket.

Step 6: Remove your soap when it hardens. This can take anywhere from a couple hours to a day. Cut into bars (From my pan, I cut 10 2 1/2" x 4" bars and several "samples") and let them cure for 2-6 weeks. **Always test the pH before using soap!**


The finished product is a cleansing, hydrating bar that makes a gazoodle bubbles! I can't wait to try this out in the shower and breathe the calming lavender scent... I have tried a couple sample slivers, and it is definitely one of my favorite soaps thus far!

This post was shared on Monday Mania at the Healthy Home Economist.

Tuesday, January 18, 2011

Homemade Liquid Soap


I noticed that the kids have almost used all the liquid soap in their bathroom, so I had to make more over the weekend. The process took most of the day on Saturday, although it doesn't require too much "hovering" once it reaches the solid soap stage. And, I was able to make it right in my oven! I've tried to make it in my crock pot, but I ended up burning that batch and almost ruining my crock pot... that's another story.

**For those soap makers out there who have never tried making liquid soap, here is a tutorial that goes step by step: Hot Process Liquid Soap**


Here are my ingredients. I used a recipe I found on the Instructables website (as linked above).
The soap is mostly coconut oil (for lather) and olive oil (for moisture) with a little cocoa butter thrown in. I diluted mine a little more than the woman who made the Instructable because my kids tend to overuse soap, and it lathers nicely even when runny! We also use a "bubble maker" soap dispenser in one bathroom, and it works nicely with well-diluted soap.


After weighing ingredients and mixing the lye and fats to trace, I threw the soap pot into a 250F oven. This is what the soap looked like after 20 minutes. You can't see it, but the soap actually separated and I had to stir it back together.


After about an hour, my soap looks a lot like runny mashed potatoes... it keeps getting thicker until it becomes solid and very hard to stir!


When it gets to this point, I just stir the best I can. The soap will start to turn translucent- the more translucent, the clearer your final product will be!


This is where I stopped. It wasn't fully translucent, but it was very late in the evening and it was done enough for me! I diluted it with a gallon of filtered water and neutralized the remaining lye with a solution of borax and hot water. As you can see from my first photo, I am stocked up on soap for months! I even use this soap to wash my dishes, as it leaves no chemical residue-as some store bought soaps do.