Pages

Friday, December 27, 2013

Homemade Coffee Kombucha

This post is for all those coffee lovers out there!  I have been drinking coffee since I was a teenager and still love an occasional sip or two of that wonderfully warm, invigorating beverage.  So, I was so excited to find out you can make kombucha from coffee (instead of tea)!!  The process is almost exactly like making tea kombucha.  So, those of you who make kombucha regularly (and are ready for a new treat), just substitute ground coffee for the tea and you are ready to go!  For those of you who don't usually make kombucha, here's a neat project that your tummy will enjoy...


Here's my coffee booch on day 1 (on the far left).  I simply brewed enough coffee for my 1 gallon container.  I used 1t ground coffee per cup of water, so about 5 T for about 1 gallon water.  Since my spoonfuls were heaping, I rounded down :).  Then, I added 1 cup organic sugar and let it dissolve.  When the sweet coffee was cooled down to around 100 F, I added my scoby and about 1 cup left-over liquid from my previous batch- you can use either tea or coffee booch as a starter.


I go by taste when bottling my booch, and this batch took about 2 1/2 weeks to finish fermenting.  Remember, even the caffeine is being changed at a molecular level- the finished product will not be sweet or caffeinated.  I bottled as soon as I could no longer taste the sugar and the nice kombucha tang was developed. 

Usually, I let my booch rest for a second ferment, either with fruit or juice as a flavoring, but I really couldn't decide what to flavor this with... maybe a vanilla bean?  or cinnamon stick?  The choice is yours!  There is definitely a coffee aftertaste to this beverage, so anything that would compliment that would work :)  I am skipping the second ferment this time and putting this baby right in the fridge.  Now, I can enjoy two of my favorite morning beverages together in one cup!  Enjoy!!

Sunday, October 20, 2013

Homemade Sausage and Seafood Gumbo

This is the real thing, y'all- real Creole gumbo, straight from New Orleans.  Did you know that the word "gumbo" traces its root back across the Atlantic, where it derived from an African word meaning "okra"... Okra is what makes this soup thick.  It is the combination of African, French and Spanish cuisine that makes Creole food so delicious, sometimes a bit spicy, and always unique.


My mother-in-law, a Creole food master, passed her recipe on to me and I'm going to share it with you today.  She learned it from her mother-in-law, who grew up in the French quarter- the heart of New Orleans.  This soup is usually served with rice and French bread (great for sopping up the remaining broth), but as you can see from the picture I am nixing the rice and bread because I am trying to eat fewer grains.  It is fantastic as is!
 
What you'll need for a little bit of Creole heaven:
 
1.5 lbs raw shrimp, shelled and de-veined
12 oz lump crab meat, flaked
6 oz oysters (optional)
1 lb smoked sausage or andouille, sliced in disks
1/2 lb okra, cut in disks (discard the tops)
butter
1 med. onion (chopped)
2 ribs celery (chopped)
1 green bell pepper (chopped)
2 large garlic cloves (pressed)
3 bay leaves
1/4 t dried thyme
1 T Cajun seasoning ( I like Tony Chachere's)
1/4 t red pepper
1/2 t black pepper
1 T Worcestershire sauce
1 (28 oz) can diced tomatoes, with juice
7 cups water
2 t dried parsley
rice and French bread (optional)

Brown sausage in a large pot, then remove.  In the sausage drippings, saute the okra for about 5 minutes (add butter if too dry).  Add the other vegetables to the pot and saute for another 3 minutes.  Add meat, tomatoes, water and other seasonings to the pot (except parsley and seafood).  Simmer over med. heat for 30 minutes.  If you want a thicker soup, simmer uncovered- if you like broth, cover while simmering.  Finally, add seafood and parsley to pot and simmer another 10 minutes. 

Serve with a scoop of rice on top of the gumbo (That's the New Orleans way) and a large slice of French bread on the side.  You may want to put a bottle of Tabasco on the table for those who like to spice it up!  Enjoy!

Monday, October 7, 2013

Homemade Chicken Chowder

Ok, so I'm on a soup kick!  I LOVE soup... and it is so comforting  to sip on a cool fall evening :)  This time, I am making a soup that I have enjoyed for years but thought I could only get out of a can:  Chicken Chowder!  Yum.  And, this dish can be made from leftover roast chicken and just a few more ingredients that are always in our pantry :)

This is a recipe I just came up with a couple days ago, but I've already made it twice!  Here's what you'll need for this creamy, delicious soup:


Chicken Chowder

1 chicken breast (or about 1-1/2 cups left-over roast chicken pieces), chopped and browned in butter
1 medium organic yellow onion, chopped
2 medium or 3 small organic potatoes, chopped in cubes
1 c frozen, organic corn
about 1.5 quarts chicken stock
1/2 c organic heavy cream
3/4 c  whole-fat milk

to thicken, make a roux with 2 T butter and 1 heaping T unbleached flour- heat in skillet until combined.
For those who are gluten intolerant, use corn starch mixed with a little water.

Directions:
Melt 1 T butter in a 2-qt saucepan and saute onions, potatoes and corn for about 5 minutes.
Add chicken stock, cream,milk and cooked chicken.  Season with salt and pepper to taste.  Simmer for about 20 minutes, or until potatoes are done.  Thicken (optional) with either method, as described above.

This is a quick way to make a wholesome, delicious dinner for your family!  Enjoy!

Homemade Borscht With Beef Stock

When I was pregnant with my third child, we lived in an apartment building with many wonderful neighbors... one was from Lithuania.  We spent one afternoon play date at our foreign friend's home when she offered me some of the borscht she had made that day.  Never having had it before, I was naturally very curious!  Cold beet soup (with lots of sour cream) sounded delightful, and being pregnant gave me a good excuse to eat four meals that day :)
 
I have always loved beets, mostly the pickled beets my mother used to can, but this soup was amazing!  So, as homage to my generous Lithuanian neighbor, I have made borscht for my family.  It is gorgeous (just look at the picture!) and chock full of nutrients.  I made it with my homemade beef stock to make it even more digestible...


Here's the recipe I tweaked;  It comes from the Most for Your Money Cookbook, published in 1938:
 
4 medium beets, peeled (and chopped)
1 onion, grated on medium grater
juice of two lemons
3 Tablespoons sugar ( I used organic evaporated cane juice)
salt and pepper to fancy
2 eggs
1 pint sour cream
 
Put beets and onion in a 2-quart saucepan and boil 20 minutes. (I boiled them in half beef stock and half water)  Add lemon juice, sugar and seasonings and boil 5 more minutes.  Beat eggs with cream; stir in slowly. Take off the fire and allow to chill.  Makes 6 to 8 portions.  
 
This a great lunch, since there is no heating involved!  Just take out of the fridge and enjoy!


Wednesday, October 2, 2013

Tonight We're Gonna Eat Like It's 1899 (Clam Soup Recipe!)

Are you tired of all the new recipes out there that call for processed, boxed, chemical-laden, fake food?  I sure am.  Thankfully, I have the Internet :)  It is my friend when it comes to finding wholesome, nutritious, easy recipes that are good for my family.  My latest obsession is vintage cookbooks!  If you haven't looked for them online, you probably don't know that there are literally thousands of free cookbooks online that date from before 1900 and onward.  My favorites are the pre-1900's cookbooks because they use real food ingredients- nothing fake, nothing processed, all dripping in real butter and animal fats!
 
Speaking of animal fats and butter, did you know that the first heart attack in the U.S. wasn't until 1920?  That was a few years after the invention of Crisco in 1911.  I think I'll stick with the God-given natural fats that people have used for thousands of years.  Obesity and clogged arteries weren't a problem back in our great-great-grandparents' day.


As I said before, I have been obsessed with vintage cookbooks lately.  Here is one link that takes you to thousands of fantastic books that have expired copyrights- FREE to everyone who has a need or interest in them :)
 
The recipe I am going to share with you comes from the Church of the Good Shepherd Cookbook of 1896. 
As pictured above, I made the delicious Clam Soup, submitted by Mrs. P.W. Talbott:
 
Clam Soup
 
One pint water, one pint of sliced peeled potatoes and one onion.
Boil until potatoes and onion are thoroughly cooked then mash. (I didn't mash)
One dozen clams chopped, one quart of rich milk, seasoned with butter, pepper, salt and celery to taste.
 
Most of the recipes in these books are just as simple!  If you have never cooked from scratch, this is a great place to start.  There are also household tips at the end of a few cookbooks :)  It is really interesting to read about herbal remedies and clothes washing in the 1800's! 
 
So, put on your apron and try to get back to your roots...  and enjoy the fruits of your labor!


Monday, September 9, 2013

Homemade, No-Sugar-Added Kids' Snacks (Two Recipes!)

I have been racking my brain, trying to find some new healthy snacks for my brood of 4.  I get anxious around the 3:00 mark when I hear them start saying, "I'm hungry, do we have any snacks?"   Now, I can say "YES!" with enthusiasm :)  We do have snacks, and they are good for you!  Although, I do usually keep that last part to myself...
 
 
The first recipe I'll share with you is for a homemade Larabar.  Have you ever tasted those over-priced energy bars?  They are fantastic, but not for $1+ per bar!!  Ouch.  So, I have researched and formulated my own.  Here's what you'll need to make a batch:
 
 
1/2-1 cup nuts (pecans, cashews, almonds, etc.)
1 c dates
1/2 c chocolate chips ( I used Enjoy Life mini chips)
pinch sea salt
 
Using a food processor, chop the dates, nuts and salt until the mix is workable consistency.  I would start with fewer nuts, then add as you go.  If you use too many nuts, the consistency will be too dry and the bars won't stick!
 
Remove from the processor and fold in the chocolate chips.  I formed bars by folding the mixture in wax paper and pressing them with a rolling pin, but  you could also make bite-sized balls...


Even my picky eater liked these!  They are great for snacking but packed with good energy foods. :)
 
 
The next recipe is for wheat-free, sugar-free oatmeal/banana cookies! The ingredients are so simple, too!  Here's what you need:
 
3 very ripe bananas
2 c organic rolled oats
1 c chocolate chips (I used Enjoy Life mini chocolate chips)
1/3 c coconut oil
1 t vanilla extract
 
Pre-heat oven to 350 F
Puree bananas in a food processor and add to rest of ingredients.
Place in spoonfuls onto cookie sheet (these may or may not hold together well- don't worry!)
Let rest while oven heats.
Bake for about 20 minutes, or until golden brown.


We enjoy these after they are chilled in the refrigerator!  They have a banana bread flavor that my youngest son loves.
So, feed your kids a healthy after-school snack.  These treats will leave them satisfied til dinner :)  Enjoy!

Homemade, Fermented Raspberry Lemonade

My husband was raving the other day about a raspberry lemonade he had tasted... so, I went to the store and looked at the ingredients label of the brand he indicated.  What a waste of lemons and raspberries!  The second ingredient was sugar, and it was (of course) pasteurized and had been sitting on the shelf for who knows how long.  My solution:  make my own! 

My first thought (as I schemed while driving home) was that I would make it fermented, with very little sugar in the finished product.  I already had some organic, frozen raspberries from our local Publix and whey left over from some raw milk that had soured.  I happen to LOVE the "Punch" recipe in Nourishing Traditions, by Sally Fallon,  so I had a good recipe to tweak.

Here's my recipe for delicious- and nutritious- homemade raspberry lemonade:


juice of 7 organic lemons
1c + fresh or frozen organic raspberries, pureed with a little filtered water **
1/2 c organic evaporated cane juice
1/4 c whey
filtered water


That's it!  Just mix the ingredients (except water) together in a 2 quart canning jar and fill with water to about 1" from the top.  Secure lid and let it ferment on the counter for 48 hours (this should not need to be "burped" as citrus ferments slower than other fruit, but you may want to check at the 24 hour mark).  Strain out the pulp and seeds when the 48 hours is up, then stick in the fridge to chill!


It has been hot around here lately, and it will probably stay that way through November. So, we will be drinking this well into fall!  Enjoy!

**UPDATE:  This also works wonderfully with blueberries or strawberries instead of raspberries :)

Saturday, July 20, 2013

Homemade Rye/Pumpernickel Sourdough

We have discovered recently that my daughter with gluten sensitivity can tolerate sourdough bread!  As long as she doesn't over-indulge, it doesn't seem to bother her the way bread made with commercial yeast does- that's because sourdough works on gluten slowly, breaking it down better than commercial, fast-acting yeasts.  So, there is less gluten in the finished product, making it easier to digest.  Yes, it takes longer to make, BUT here are two delectable recipes to make the extra time well worth it!:
 
 
I have experimented with two new sourdough recipes over the past few days, and they are both great- I think my favorite is the rye loaf... my bread-loving-daughter seems to enjoy the pumpernickel.  The loaves follow the same general directions, so I am putting them into the same post.
 
Rye Sourdough:
1 3/4 c water
1 3/4 c rye flour
1 3/4 c unbleached wheat flour
2 T maple syrup
1 3/4 t salt
zest one orange
 
Pumpernickel Sourdough:
1 3/4 c water
1/3 c molasses
3 T cocoa
1 3/4 t salt
1 1/2 c unbleached wheat flour
1 c rye flour
1 c whole wheat flour
 
Directions for BOTH recipes:
Mix all ingredients (the dough will be wet but firm).  Let rest 15 minutes.
Sprinkle dough with flour, then mix again.  Let rest 15 minutes, then repeat.
( I usually mix with a wooden spoon- just scrape and flip the dough into the middle until incorporated.)  Click here for a great website with more detailed instructions for sourdough :)


Here's what your dough should look like at this point.  It should hold its shape pretty well- if it is too wet, just add more flour until it is very stiff.


By the last sprinkle/mix, your dough should be stiff enough to handle.  Move it to a floured surface and clean out your bowl.  You may want to momentarily knead the dough and form into a ball before putting it back into the clean bowl. 
 
Cover the dough with a thick, wet cloth or plastic wrap to keep the dough from going dry.  Let dough sit overnight (12 to 15 hours).


After the first rise period, you are ready to shape your dough.  I made mine into a boule (French for "round")... you could also make a batarde (an oblong loaf).  Click here to view a great video on how to shape your loaves.
 
In the picture above, I have used a stainless steel bowl instead of a banneton (proofing basket).  I lined it with a floured towel and placed the dough inside, seam side UP.  Then, let the dough rise (covered with towel or plastic) for another 1- 1 1/2 hours.
 
Heat your oven to 450 degrees F about half-hour before the rise is finished.  Be sure to heat your baking stone, too!


When the second rise period is up, use your peel (I used a piece of cardboard) to flip the bread out of the proofing "basket".  Be sure to flour the bread so that it won't stick to the peel when you slide it onto your baking stone.  Brush off the excess flour, then cut some shallow slits in the bread skin with a sharp blade.  I used a clean blade from a utility knife/ box cutter.
 
As you are shutting the oven door, throw about 1/3 cup water onto the oven floor.  If you have a gas oven, place a shallow pan on the lowest rack before you heat the oven and use that to catch the water.  The steam will help set the crust on your loaf!
 
Bake for 20 minutes, then reduce the temp to 400 degrees F for 10 minutes more.


Here is my loaf-almost done!  When you slide the bread off your "peel", be sure to use quick movements and put bread as close to the center of your stone as possible.  ( I bought this stone at a discount store for about $10)
 
Check the internal temperature of your loaf before removing from the oven.  It should be 200 degrees F- I use an instant-read thermometer.  If the loaf is too cold, lower the oven temperature to 375 and bake for another 10-15 minutes.


The finished loaf!  It could be in a bakery window, right?!


The pumpernickel loaf was amazing- not too heavy, with a crispy crust and lots of flavor!  My rye didn't rise quite as much but was really tasty!  Be sure to eat with plenty of butter :)
Enjoy! 

Monday, July 15, 2013

Homemade Deodorant

A few months ago, I wrote a post entitled "5 Steps to a Chemical-Free Morning Routine"... since then, I have run out of homemade deodorant.  So, I thought I'd take this chance to show you all how it's made ;)  This deodorant is so easy to make, there are no excuses NOT to make your own!  While conventional deo is full of nasty chemicals and synthetic perfumes, this homemade version is natural, moisturizing and really keeps the stink away.  It costs very little to make, too!


For each batch (which fills 1 1/3 deodorant stick container), you will need:

3 T coconut oil
2 T shea butter
1 T beeswax
2-4 T baking aluminum-free baking soda
essential oils of choice

Melt oils and beeswax together, on Med-Low heat, in a small pot.  


When oils/wax are melted, add desired amount of baking soda.  Some people are sensitive to baking soda, so you might want to start with a little and add more as you see fit.  Stir until the mixture doesn't separate when left alone for a couple minutes, then add your essential oils.  This time, I used lavender.


When the deodorant is a pudding-like consistency, pour into recycled deo tubes or cosmetic-grade pots.  I made 3 batches today, so I had enough for 4 :)  I located 3 gel deo tubes and reused them. Then, I put the rest in an old lotion pot !


The gel deo tubes have small holes at the top, allowing only a small amount to be dispersed at once.  This type of tube works perfectly with the homemade paste!


There you go!  Homemade deodorant in just a few easy steps :)  Use only a small amount- a little goes a long way.  Enjoy!

Sunday, July 14, 2013

Homemade Apple Cider Vinegar

If you are like me, you go through a LOT of ACV (Apple Cider Vinegar).  I make my own salad dressings, non-toxic cleaners and bone stocks- and I use ACV in all of them!  The problem is, organic, unpasteurized ACV can get expensive... the solution is:  make your own :)


I found some really easy-to-follow directions online, with pictures!  The only thing I did not do was add sugar.  The organic apples I used had plenty of natural yeasts and sugars to get the fermentation process going.  The only difference in our finished product is that mine is a bit lighter in color than the other one. 
 
I used enough cores and peelings from organic apples to fill a two quart jar- just throw in your scrap pieces and fill water to cover.  You can save the good parts of the apple for a pie or homemade apple sauce!  Then, cover your jar with a thin towel, secured with a rubber band, and wait :) 
 
After about 10 days, your apples are spent and you can strain them out.  Then, cover your liquid again and let it sit until the liquid tastes like vinegar.  This may take up to two weeks or more, depending on the temperature of your kitchen.  (Mine took a bit longer because my hubby likes to keep the house cold!)
 
When your vinegar is ready, you may strain it again or just cap it and stick in your pantry.  No refrigeration required, and no pasteurization.  The grainy sediment at the bottom of the jar is called the "mother" and is actually beneficial to consume. 
 
Since I used scraps to make my vinegar, it really didn't cost any extra money-just a little time. ;)
So, take a little time to make your own ACV!  Your pocketbook will thank you.  Enjoy!

Thursday, May 16, 2013

Homemade Healing Salve

This post was inspired by a friend's request for help with first-aid items to keep on hand :) 

As you can see, we have already dug into this salve- actually, my kids reach for this salve regularly!  They have learned that it can soothe the itch of a bug bite or help bruises heal more quickly.  Since I have added lavender essential oil, it also smells great :)  We use this salve for anything and everything- scrapes, bug bites, blisters, chapped skin, bruises, sun burn, etc.  If I had a baby in the house, I would also use this to prevent/treat diaper rash!


Here's my recipe for healing salve: (all herbs are dried)
2 parts plantain leaf
2 parts comfrey leaf
1 part calendula
1 part yarrow
1 part echinacea
1/2 part rosemary
olive/coconut oil
beeswax

Depending on how much you are making, choose your measuring tool (anything from a tablespoon to a cup).  Fill a canning jar about 1/3-1/2 way with herbs, then cover the herbs with olive oil, coconut oil, or a mixture of both.  Cover tightly with lid.

Next, set your jar on a thick cloth in a crock pot.  Fill crock pot with water, up to lid of jar.  Set crock pot on "warm" setting and let it warm the herbs for 2 to 3 days.  Shake once a day to keep herbs circulating (add more oil if the herbs are not covered).  Add water to crock pot as it evaporates.

After infusing your oil, strain off herbs into cheesecloth or other thin towel.  Place infused oil into a small saucepan.  Add 1 oz beeswax for every 4 oz infused oil and heat until beeswax is melted.

Remove oil from heat and add essential oils (I like lavender)- pour into containers while still warm.
Your homemade salve is ready to use when it is completely cooled!  

Sunday, May 12, 2013

Homemade Italian Stuffed Peppers- NO Fillers!


I love the taste of green peppers- on anything!  This is for all you green pepper lovers out there :) 
 
I've always thought you had to have fillers (bread or rice) or binders (eggs) in stuffed peppers, but this recipe calls for neither.  It is very flavorful and filling and a meal in of itself.  These peppers are also good warmed up as lunch leftovers! 


1/2 lb ground beef
1/2 lb Italian pork sausage ( I used link sausage and took it out of casing)
2 T butter
4-6 peppers, red, green or yellow
1 small onion, minced
green pepper tops, minced
2 garlic cloves, minced or pressed
2 cups seasoned, organic tomato sauce
salt and pepper to taste
1 cup mozzarella cheese, divided
 
 
Heat oven to 350 degrees F
1. De-seed and wash peppers.  Save tops to mince and add to stuffing.
2. Brown meats in large skillet, set aside.
3. Add butter to skillet and saute onions and minced pepper tops until soft.
4. Add meat, garlic, tomato sauce and 3/4 c mozzarella cheese to skillet.  Mix until incorporated.  Season to taste with salt and pepper.
5. Fill peppers with stuffing and place in a shallow, greased pan.  ( I used a cast iron skillet) Sprinkle remaining cheese over peppers.
6.  Bake, covered with foil, for 30 minutes.
7.  Bake another 10 minutes, uncovered. 


As an added treat, my son made himself an "Italian sloppy joe" with some leftover stuffing.  He said it was even better than the peppers!  Two meals in one- I love it!

Friday, May 3, 2013

Homemade (Gluten-Free) Peanut Butter Cookies

My mom made some mean peanut butter cookies when I was growing up... she still makes them when we have a family get-together.  They are comfort food at its best. 
 
Since my family is trying to cut out grains, I have found a great recipe for these yummy morsels that calls for NO wheat flour.  I have also cut the sugar down from the original recipe, and the peanut buttery goodness shines through :)


This recipe makes 2 dozen cookies:

1 cup natural peanut butter
1/4 c organic sugar
1/4 c packed organic brown sugar
1 large egg
1/4 c + almond flour
1/2 t aluminum-free baking soda
1/2 t vanilla extract
1/4 t fine sea salt


Heat oven to 325 degrees F.  Mix all ingredients until well-incorporated.  Roll into balls (about the size of large marbles), then smoosh with a fork in a grid pattern. 


If the dough is too sticky, just add a little almond flour as you roll them out!  Bake cookies for 8-10 minutes, until light golden brown.  They will be very light and fluffy- great with a big glass of raw milk :) YUM!
( just a note:  parchment paper was mentioned in the original recipe, but ours worked fine without)

Let these babies cool for at least 5 minutes before you dig in... and you will want to dig in!  These are so yummy :)  Enjoy!

Thursday, April 11, 2013

Homemade, Old-Fashioned Rice Pudding


Rice pudding is one of life's simple pleasures.  It is so easy to make, and so yummy!  I especially like this recipe because it uses so little rice :)  I would rather taste the rich milk than have to chew a mouthful of rice in my pudding.                                                              


Here is the oh-so-simple recipe for this delicious dessert:

4 cups milk
3 T rice (I used basmati)
1/2 t salt
1/4-1/2 c natural sweetener (honey, maple syrup, agave nectar, etc)
1 t vanilla extract


Combine all ingredients and pour into a buttered 1 1/2 quart casserole.  Bake at 325 degrees F for about 3 hours.  Stir occasionally during the first hour.   Chill before serving.  (I like to mix in raisins for an added treat) Enjoy!


Saturday, February 23, 2013

5 Steps to a Chemical-Free Morning Routine

I love to use products that I've made myself.  No label-reading necessary, because I know exactly what is in them.  And, my friends are always willing to be guinea pigs for my homemade concoctions, so I get free feedback from them.  If something doesn't work for any or all of them, I can make adjustments until it is perfect! 
 
In this post, I am going to share with you 5 easy steps to make your own chemical-free bathroom products- just imagine, a morning routine that doesn't involve bathing yourself in chemicals and synthetic perfumes!  


Step One:  Make your own tooth powder!! 
Did you know that, historically, fluoride has been added to water supplies as a poison?  Yes, fluoride is a toxic chemical that has been forced upon us in drinking water and conventional toothpaste.  You can take my word for it, or do your own research (here's a good article, or this one). Here's the good news: you can rid your life of fluoride-ridden toothpaste!  Make your own tooth powder :)  Here's the recipe I use every day:

Tooth Powder
2 T aluminum-free baking soda
1 t fine sea salt
1/2 t cinnamon
1/8 t clove powder-or-5 drops clove essential oil

Mix ingredients well and keep in a sealed container.  To use:  wet your tooth brush, then dip bristle tips into powder.  Brush as usual.  This powder will not only clean your teeth but give you fresh breath as well!

Step Two:  Make your own deodorant!!
Please read the ingredients label on your stick of conventional deodorant.  First off, can you identify all the ingredients?  Didn't think so.   The worst ingredient in conventional deodorant (in my opinion) is the aluminum.  I read an article recently that said 100% of malignant breast tumors contain aluminum... where would the tumors absorb this aluminum?  My guess is:  conventional deodorant! 

Although "natural" deodorants work, I am still not convinced that they are totally safe.  Better safe than sorry- make your own!!  Here's the recipe I use every day:

Deodorant Paste
3 T coconut oil
2 T shea butter
1 T beeswax
4 T aluminum-free baking soda
essential oils (about 5-10 drops)

Melt your oils over low heat (heat until beeswax is completely melted).
Add baking soda and stir... and stir... and stir until everything is mixed thoroughly.  You can take breaks in between stirring.  When mixture has cooled and started to solidify, you can add your essential oils (I like orange and ginger).  Store in a cleaned deodorant tube or a small pot in your bathroom.  This can be spread on or rubbed in with your fingers.

Step Three:  Make your own lotion!!
Once again, read your labels!  Store-bought lotion is nothing but chemicals with a little oil thrown in.  Do you really want to slather chemicals on your body right out of the shower?  That doesn't sound too clean to me.  Here is a very simple recipe that I use every day (including on my face):

Body Butter
3oz shea butter
3oz cocoa butter
3oz coconut oil
3oz almond or grapeseed oil
essential oils (optional)

Melt solid oils over low heat, then let them cool for 30 minutes.
Add liquid oil and any essential oils for scent.
Chill until mixture starts to solidify.
Whip with a hand mixer until light and fluffy!
You can store this in your bathroom in a sealed container, as long as it doesn't get too hot.

Step Four:  Make your own shampoo and conditioner!!
Check out my recent posts on liquid shampoo and vinegar rinse and henna bar shampoo!
Store-bought shampoo has lots of chemicals- some for lather, some for shine, some for sensitive scalp, etc.  If you just use a homemade, chemical-free shampoo, you will have lather, shine and a healthy scalp, and without all those added chemicals :)

Step Five:  Make your own soap!!
This is  a big step, but I know you can do it!  There are many how-to videos and instructables online that teach soap-making basics.  I have also done a detailed post on making goat milk soap.  If you are not comfortable making your own, just be careful when buying soap at the store.  Pick soaps that do not have synthetic scents and chemical additives.  Some skin problems, like eczema, are aggravated by harmless-looking ingredients and fragrances.

If this list looks very daunting to you, just take it one step at a time!  Try one recipe per week, or two if you're feeling motivated :)  You can rid your life of chemicals and feel good about doing it.  Enjoy!

Friday, January 25, 2013

Homemade Herbal Wine


I have been wanting to make my own wine for years!  Not the nitrate-ridden, chemically enhanced wine you buy at the store, but naturally-fermented, organic wine that I have made without any added crud.  When researching online for wine recipes, I had a very hard time finding anything that didn't call for "yeast and nutrient", "enzymes", or "Campden tablets".  All I want is old-fashioned wine, is that too much to ask?  Way back when, they didn't have all those fancy additives, and I don't want to use them.

I discovered that my favorite online herb store, The Bulk Herb Store, carries a product called Berry Herbal Brew- a naturally-fermented herbal wine mix!  I was curious and wanted to try it for myself... I already had a few cups of organic, homegrown, wild muscadine grapes that I picked on our property- that was a good start!

The directions for Berry Herbal Brew called for ingredient in "parts":  one part herbal mix, three parts water, two parts seeded grapes, one part blueberries, one and one-half parts sugar.  The ingredients in the herbal mix are listed here- nothing artificial, no commercial yeasts, no crud!  \

The final product is a non-pasteurized, no-nitrate wine that is fruity, tasty and full of herbal goodness!  I let mine brew for three weeks and finally strained and bottled it today.  It filled an empty wine bottle I had saved for this purpose, plus there was about a glassful left over to sample :)  I am amazed that my first attempt at homemade wine turned out so well!

So, if you are interested in making your own homemade wine, don't settle for those recipes calling for extra crud!  Wonderful homemade wine can  be made from  nothing but fruit, herbs and sugar.  Enjoy!

Friday, January 18, 2013

Homemade Henna Shampoo Bar


A few years back, I found and printed out a recipe for a shampoo bar.  It interested me, but I had my favorite store-bought shampoo and was unwilling to give it up... now, after trying my hand at liquid shampoo, I am ready to take it to the next level :)  Although I was satisfied with the liquid shampoo,   I was curious to try a shampoo bar on my fine, thin hair.  With the liquid shampoo, my hair is left a bit heavy, like I used a little too much product when styling it- even when I let it air dry with no product whatsoever. 

With the shampoo bar, my hair is shiny, light, soft and manageable!  Here's a picture of what my hair looks like after washing with the bar, using a vinegar rinse, and air-drying (keep in mind that I have not been kind to my hair in the recent past):


The original recipe that caught my eye so many years ago was from the Snowdrift Farms website, which has since shut down.  I changed the oils to suit my needs, and added henna leaf powder and coconut milk to improve the health of my abused hair and scalp.  Here is my revised shampoo bar recipe (oil and lye measurements are by weight, milk and water are fluid oz.):

Oils:
15 oz coconut oil
12 oz macadamia nut oil
6 oz castor oil
4 oz palm oil
3 oz jojoba oil

Lye (NaOH)
5.5 oz.

Liquids:
5 fl oz coconut milk ( I used canned., organic milk)
10 fl oz water ( I froze the water before adding lye)

At trace, I added:
1 oz henna leaf powder
0.4 oz chamomile flower powder
0.4 oz silk protein liquid
splash rosemary essential oil

While the ingredient list is extensive, this recipe is well worth the trouble!  
You make the shampoo bar just as if you were making lye soap.  

**If you need detailed directions, please see my other post on making  goats milk soap.  The only difference would be that I added the coconut milk directly to my heated oils and mixed the lye with the ice/water.**

I am so happy I found a more natural way to make my hair look healthy.  No more crazy, long chemical names on my shampoo bottles- and no more bad hair days, either!  Enjoy!

For other shampoo/conditioner recipes, chose a type:
hot process liquid shampoo and cream conditioner
liquid shampoo and vinegar rinse

Wednesday, January 2, 2013

Homemade Almond Flour + Cake Recipe!

I have been using a lot of almond flour recently.  Since I am trying to cut out grains, almond flour is my go-to ingredient when it comes to baking.  My kids seem to enjoy it, although they really miss soft wheat bread...  almond flour bread has more texture to it, but the taste is great!
 
Since the almond flour at the store is over $11 per bag (Bob's Red Mill), I have researched and learned how to make my own at home.  Although it is not as clean-looking as the store-bought kind (I use whole almonds with the skin on), the end result is just as light and fluffy.  And, my recipes turn out fantastic :)
 
What you'll need for your own homemade almond flour:
Raw or soaked/dried almonds
A powerful food processor (I use a Magic Bullet mixer)
A metal colander (see picture below)


Put about a cup of almonds into your mixer and process for about 10-15 seconds.  Do not process too long or the oils in the almonds will make your flour clump.  Don't worry if you notice chunks of almonds- we'll get rid of those shortly!


Here's the metal colander that I use as a sifter.  Do not use your regular flour sifter because the almond flour will clog it up! I just hit the colander gently against my hand and the small soft almond pieces fall through.  What you are left with can go back into the processor for another round of grinding:
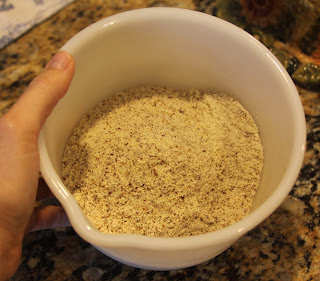


The end result is very finely ground almond flour! 


What I don't use in the following recipe goes into a jar to be stored in the refrigerator.
 
Homemade Almond Flour Cake
2 1/2 c almond flour
1/2 t baking soda
1/2 t salt
6 T honey
1/4 c liquid coconut oil
1 T vanilla extract
1 t lemon juice
3 large eggs, separated
 
Pre-heat your oven to 350 degrees F.
 
In a large bowl, mix together first 3 ingredients.  In another bowl, mix together the rest of the ingredients, excluding egg whites. Mix the wet ingredients into the dry until just incorporated.
 
Beat the egg whites until soft peaks form, then fold them into the other mixture.  Mix thoroughly but gently.
 
Pour into small, greased glass pan (for cake) or muffin tin (for muffins).  I used a buttered cast iron corn bread pan :)


I found that this recipe is perfect for 8 wedge-shaped "cakes" in my cast iron pan!  Bake for 10-20 minutes, depending on the type of pan you use (less for muffins, more for cake).  My "cakes" took approx. 18 minutes to cook to golden perfection.  They are done when browned and center is set.


These "cakes" are moist and sweet!  No need for any glaze or topping.  I think this recipe would also taste amazing with additions such as raisins, chopped nuts or apples.  Enjoy!