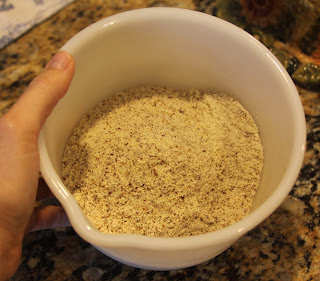
I have been using a lot of almond flour recently. Since I am trying to cut out grains, almond flour is my go-to ingredient when it comes to baking. My kids seem to enjoy it, although they really miss soft wheat bread... almond flour bread has more texture to it, but the taste is great!
Since the almond flour at the store is over $11 per bag (Bob's Red Mill), I have researched and learned how to make my own at home. Although it is not as clean-looking as the store-bought kind (I use whole almonds with the skin on), the end result is just as light and fluffy. And, my recipes turn out fantastic :)
What you'll need for your own homemade almond flour:
Raw or soaked/dried almonds
A powerful food processor (I use a Magic Bullet mixer)
A metal colander (see picture below)
Put about a cup of almonds into your mixer and process for about 10-15 seconds. Do not process too long or the oils in the almonds will make your flour clump. Don't worry if you notice chunks of almonds- we'll get rid of those shortly!
Here's the metal colander that I use as a sifter. Do not use your regular flour sifter because the almond flour will clog it up! I just hit the colander gently against my hand and the small soft almond pieces fall through. What you are left with can go back into the processor for another round of grinding:
The end result is very finely ground almond flour!
What I don't use in the following recipe goes into a jar to be stored in the refrigerator.
Homemade Almond Flour Cake
2 1/2 c almond flour
1/2 t baking soda
1/2 t salt
6 T honey
1/4 c liquid coconut oil
1 T vanilla extract
1 t lemon juice
3 large eggs, separated
Pre-heat your oven to 350 degrees F.
In a large bowl, mix together first 3 ingredients. In another bowl, mix together the rest of the ingredients, excluding egg whites. Mix the wet ingredients into the dry until just incorporated.
Beat the egg whites until soft peaks form, then fold them into the other mixture. Mix thoroughly but gently.
Pour into small, greased glass pan (for cake) or muffin tin (for muffins). I used a buttered cast iron corn bread pan :)
I found that this recipe is perfect for 8 wedge-shaped "cakes" in my cast iron pan! Bake for 10-20 minutes, depending on the type of pan you use (less for muffins, more for cake). My "cakes" took approx. 18 minutes to cook to golden perfection. They are done when browned and center is set.
These "cakes" are moist and sweet! No need for any glaze or topping. I think this recipe would also taste amazing with additions such as raisins, chopped nuts or apples. Enjoy!


No comments:
Post a Comment